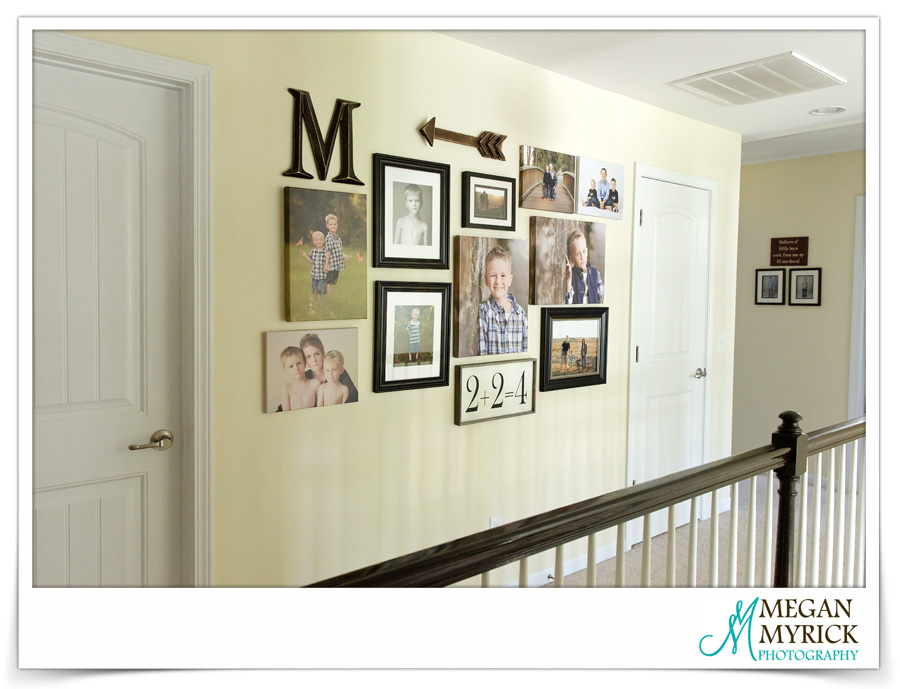
Several months back I included a section in my newsletter on gallery wall suggestions and promised I’d share my personal gallery wall with you as well. Well, today is your lucky day!! I finally snapped some pictures while the kids were at school and I’m excited to blog about it today.
I actually have two gallery walls in my home, the one I’m going to share with you today, and a second going up our staircase wall. This arrangement of photos is visible as soon as you step into our house as the entryway is wide open and the upstairs banister is exposed to the entry below.


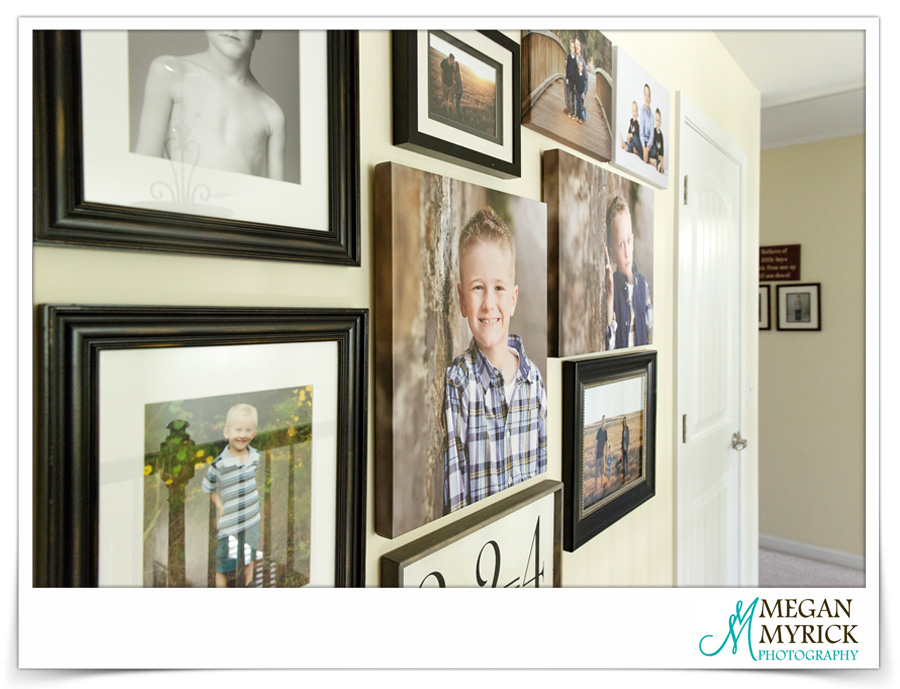
I often have clients ask how combining the different types of photo finishes look, and I always try to allay their fears. Unless you prefer matchy-matchy, I say mixing it up is the way to go. 🙂
The largest images of my two boys are both 1.5 inch deep 16×20 canvases (my youngest is actually covering the upstairs thermostat, lol). I replace these two yearly, with their newest birthday image. Older ones are recycled in other areas of the house or I remove the canvas from the frame, roll it up and stash in a tube for safe keeping. I wouldn’t recommend storing any photographic paper in attics, garages, or storage units unless they are climate controlled. You must treat your photographs with care if you want them to withstand the ages (which you do!!).
The “America” image is a 1.5 inch deep 12×18 canvas, and the remaining three are .75 inch deep 11×14 canvases. The family image is showcased in an 11×14 frame, as are the individual photos of the boys, with crisp white 8×10 mats. The portrait of my hubby and me is a 5×7, housed in a matted 9×11 frame. The wooden arrow and letter “M” are both Hobby Lobby finds, and the 2+2=4 sign was custom made by WahlToWallWordLove on Etsy.

To answer your question, nope! I don’t measure or plan my gallery walls at all. I’m more of a “hang it once and hope it’s right” type of girl. I’d honestly rather patch an extra hole or two than mess around with cutting out similar sized sheets of paper, tape them to the wall, and move it around until it’s right. I start with the two largest images and fill in from there. For now I think this wall is done (save for switching out images), although there is a small spot between the “M” and the arrow that maybe could use a little something …

I hope you’ve enjoyed checking out my gallery wall today! How about you? Do you have a gallery wall? Would you like to start one? I’d love to hear from you in the comments below! 🙂


